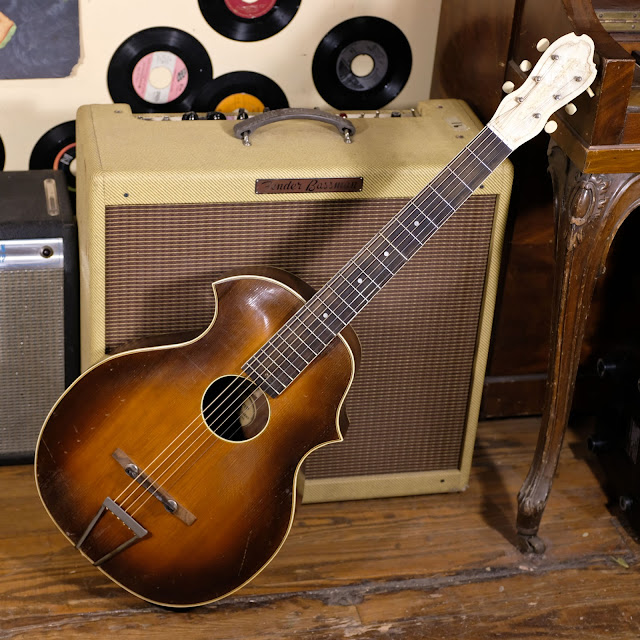
1930s Kay Kraft 12-Fret Archtop Guitar
While I've worked on a few of the 14-fret versions of this guitar, this is the first one I've worked-on with a 12-fret joint. It has the same overall design, but the top on this one is solid spruce (rather than ply) and it's x-braced. As you'd expect, the 12-fret joint and different bracing pattern (vs. ladder) gives this instrument a slightly-warmer, fuller voice. It reminds me a lot of a better-quality gypsy-jazz guitar, really, though the overall vibe makes me feel like it's most-suited to ragtime fingerpicking. Like the 14-fretters, though, it's hecka-loud and gutsy. Part of that comes from the lightness of the build and the other part from the long, 25 3/4" scale which jacks the tension up and pushes the sound forward.
Work included regluing much of the shabby-condition stained-maple fretboard, reinforcing it under the extension, a fret level/dress, fret seating and replacement (a couple with vintage stock), seating the replacement bridge better and compensating its saddle/topper, a couple of brace reglues, reinforcement/crack repair of the upper bout where it'd sustained some open-seam and compression damage, and setup. It seemed straightforward, but like on a lot of Kay products -- material choices mean you have to work-around weirdnesses. The fretboard extension, for example, rolls "up" on the bass side and "down" on the treble side. I had to install a little adjuster-screw in it that allows for adjustment of its angle. Stupid -- but it works!
I love that sunburst! This would've had a pickguard and a non-adjustable bridge to begin with, but otherwise it's all-original, too. It's 00-size with a 14 1/4" width at the lower bout.
The Kay Kraft pearloid headstock veneer is looking grand. The nut is bone and a whopping 1 13/16" in width. The neck is a medium-depth D-shape and the board is lightly-radiused.
There's a plethora of hairline cracks up and down the board, but somehow it all went back together. I replaced a tiny section of lost binding on the treble side of the board.
Oops, the above photo is a little out of focus. Oh well... you can still see my "adjustment bolt" in the end of the board. It goes right into the (repaired) center seam and into a bigger cleat I added behind it.
The adjustable bridge is a '70s Japan-made unit and, well, not bad. It has plenty of adjustment room.
The original Waverly tuners are in good spec and look great.
While nice in theory, the adjustable-angle, bolted neck joints are finicky in reality. I set them up "as normal" as far as I can get them to go, shim them up to the angle desired, tighten them, and then also installed a banjo-style "keeper bolt" from the neckblock into the bottom of the heel to "lock it" in place. The adjustable bridge does the rest for setup needs.
The back-angle on the bridge is nice and sharp -- which helps drive the heavier x-braced top.
I had to move the tailpiece just slightly to get it on-center. This style of tailpiece can get out-of-whack simply by incorrect placement of one side of its trapeze-bars or when tension is applied. The neck is aligned on-center with the body but the tailpiece -- which was theoretically installed "on center" -- wasn't when it got to the string-retainer-bar. Ah, '30s hardware!


Comments
you saved her for future generations to love and cherish