
Workshop: Silvertone Electric Hollowbody Overhaul

This is a '49 Silvertone H53 (the H50 equivalent in the Sears catalog) and it came in down on its luck. The neck was loose, the top was collapsing, and the electronics were hairy. It had some back regluing on the seam over the lower bout, but was otherwise serviceable, however. Entries on the web list these as solid wood guitars, but they're actually ply -- just like a Gibson hollowbody electric of the same time would be. In fact, the reason that the top collapsed its arch on this one is that Harmony thought the thick ply would hold-up fine without bracing. Oh well!

The first thing to do is reset the neck. After using a seam separator to knock the fretboard extension loose, some taps with a rubber mallet knocked the neck right off.

Because the joint sort-of sucks, I'm gluing and bolting this neck. Here I've drilled two holes for my "bolts" (drywall screws) to go through to the heel.

The rout for the pickup makes this double-bolt job easy-peasy. Here I've fit the neck back in and am using an awl to mark where I need to drill pilot holes for my screws in the neck's heel.

After fitting some shims into the dovetail to get the bottom of the neck heel to firm-up and stay put as it should, I glue and clamp the heck out of this.

Here I'm using a small wrench gizmo to tighten up the fresh screws.

Some finish washers help to keep these snug.

Since there's not much point in rebracing the top, the solution to its collapse is to install this center-block under the bridge area -- just like on many modern "hollowbodies" which are, in fact, "semihollow" due to the central block.


The next bit was to attack the harness. This has great old Gibson P13 pickup as factory equipment (Harmony bought P13s from Gibson in the 40s as Gibson liquidated their stock of them when they moved to P90s as standard). The harness itself is ok and just needed cleaning, but...

...it also needed a ground to the tailpiece, so I added one.

In the end, I put the whole guitar back together and played it... and it sounded great... except the pickup seemed to "rattle" and then it became clear that it was cutting out. I opened-up the pickup and found that the "hot" side was wired fine...

...but that the "ground" side of the pickup's lead was detached and only mostly making contact. Gibson originally taped the sides where the leads came off so they wouldn't contact the cover of the pickup and that makes the corrosion you see on the coil, unfortunately. The separated ground lead came out of a part of this corrosion and I could not, for the life of me, find the thread of coil to "make it fast" to.
Note that this pickup is actually not a typical P13 pickup of the sort that I know well (which are built like a P90 with non-magnetic poles or a non-magnetic blade sticking through the coil and the actual magnet located on the baseplate of the pickup) as this one is made more like a "typical" 30s/40s pickup with the blade/polepiece a magnet itself with the coil wrapped around it.
The reason that P13-style designs of all stripes end-up having troubles (whether it's a rattle sound or dead coils) is because the bobbin and coil aren't secured to the baseplate and are free to move around a little bit inside the cover. This means that things bounce around as the guitar is handled over many, many years and they loosen up. The leads from the coil are very fragile and often break because of this.

Because the original pickup needs to be rewound, my solution for the guitar for the moment was to swap-in a parts-bin Alnico P90 and modify its baseplate to fit the original cover over it. Compared to the original pickup, I was able to get better string-to-string balance via adjusting the poles on the P90 before putting the cover on.
My final install -- due to the sunk top and warped original plastic pickup ring -- places the tabs for the P90's baseplate on top of the ring to get the pickup closer to the strings. I think this was a better choice compared to jacking-up the ring itself, as it looks a little more natural and is more secure.
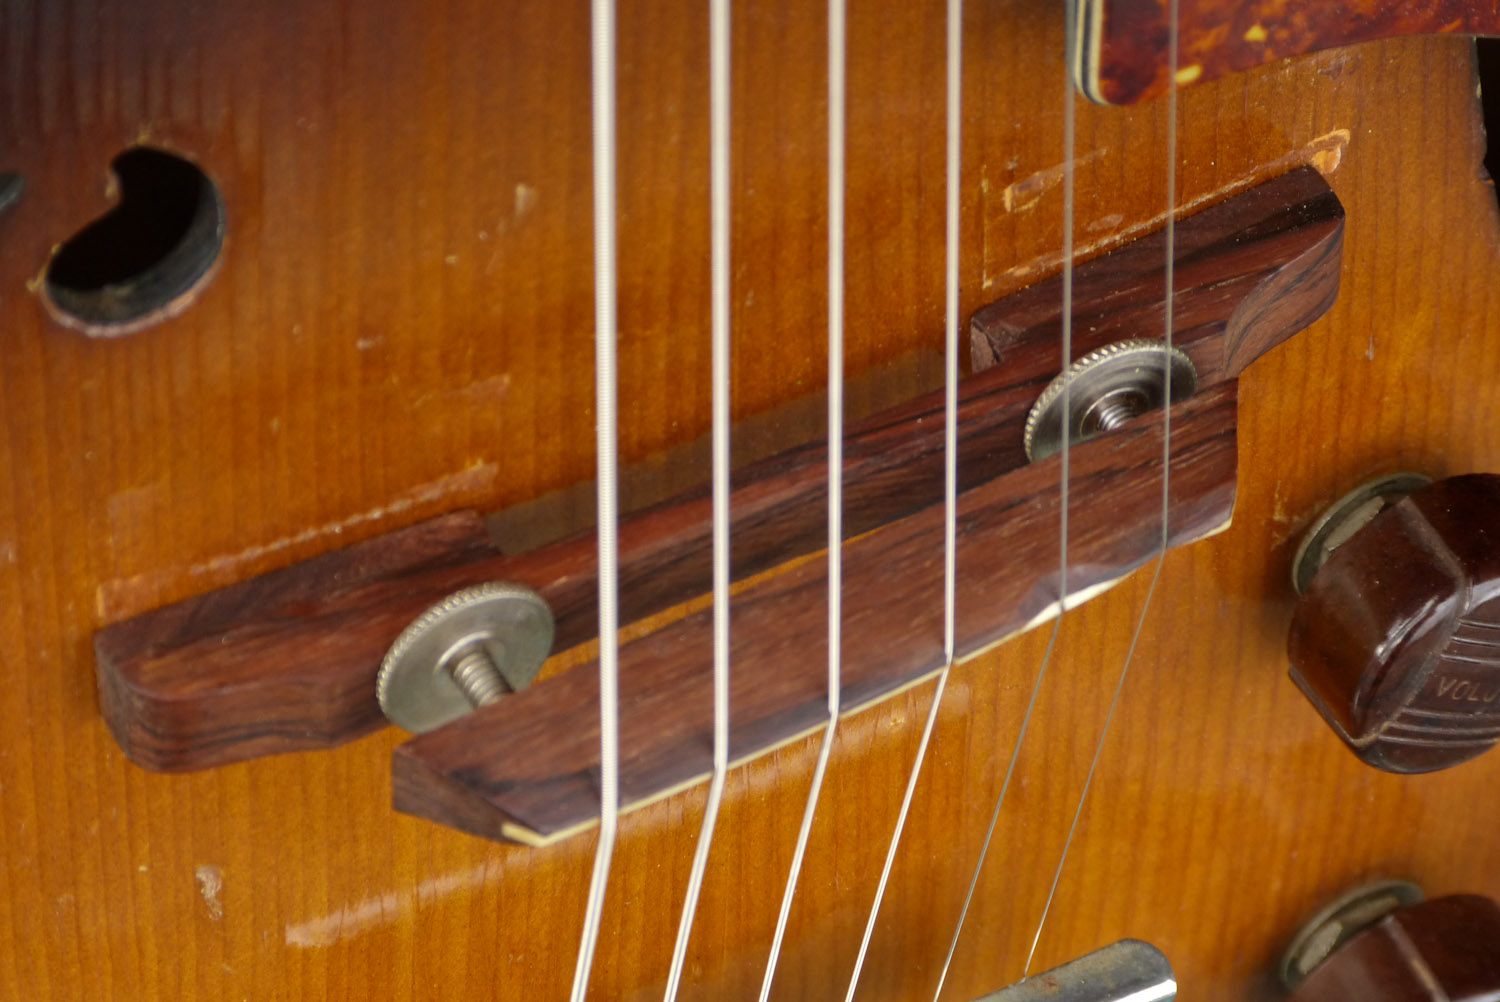
The final "major" work aside from doing a fret level/dress and setting the guitar up was to the bridge. Instead of making a new bridge or new top for the bridge, I glued rosewood "feet" to the original bridge's feet and then replaced the adjustable threaded posts with longer posts to get more adjustment height. This is actually a pretty tall bridge for an archtop, but it does work just fine. I then compensated the B and high E string slots for better intonation. The guitar still needs to wear a wound-G string set, however, due to the "vintage" compensation.
Comments