Workshop: Bandurria Fixits Part 1
One of the most common requests I get is to show more "in-process" photos of instruments. So, I present to you an "untouched" Spanish bandurria, c.1900. Do you see how I have one-ply cardboard down on the work surface? This is to give me a slightly softer surface to place the instrument on yet also something it's not going to move around on (like cloth or foam). It will also absorb glue messes if need be.
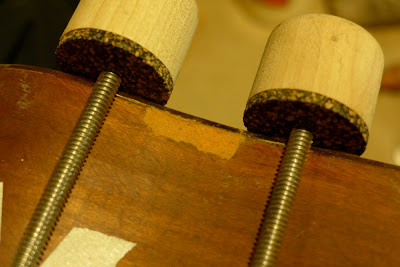
This one has friction tuners for all 12 strings. The bandurria is essentially played like a mandolin but strung in 6 courses with fourths, rather than fifths, tuning. An interesting historical note is that the bandurria was the instrument that actually sparked the "mandolin craze" of the late 1800s in America. Spanish troupes had been traversing the country in the 1880s and folks really liked the sound of these bandurrias. They were incorrectly identified as mandolins by concert-goers and ever since it's the mandolin, rather than the bandurria, that has wormed its way into the double-strung treble range of fretted instruments in the US.
Loose binding, fret ends poking out from the side of the board, multiple small hairlines in the upper bout area...
Three longer top hairline cracks...
The back has a bigger crack and the seams are open in numerous places...
...and due to wood shrinkage on the sides/back, the back braces have punched through the sides either with small cracks or in this one spot, cracked enough that wood is missing entirely.
First I remove the hardware...
...then I start fixing cracks and bad seams. Here, I can tell that the back is not going to want to fit back correctly. In this case, since the market appeal (and hence value) of this instrument is probably not going to be extremely high, I'm not going to go to the effort of entirely removing the back and adjusting the sides until they fit perfectly. Instead, I make it structurally sound and leave a small bit of overlap that's likely not going to matter to a player at all.
This is my "tool" for getting into tight seams and sanding a joint clean for gluing. I've simply used some adhesive sandpaper and stuck it on one of my thin ruler/gauges for a double-surface sanding implement. One can apply this to a seam separator knife as well, but I like the extra flexibility of small rules, better.
This makes quick work of cleaning up the gluing surfaces.
This is the other side, but the process is similar. Here I've shot glue into the seam and then smudged more into the gap. This is Titebond Original wood glue.
Here's my first wipe-down to remove excess glue. Yes, this is an old kitchen sponge. That's where I get all my workshop sponges from.
Now I've clamped it all up with my cello clamps, but as you'd expect, glue has sprung out of the seam as I put tension on it.
So, I leave tension on the seam but remove a clamp at a time to remove most of the excess glue.
Not bad! If there are any other little "daggers" of small extra glue bits I'll just chip them off once the job is complete.
On the other side, I've started to repair the seam separation but I'm also repairing a loose back brace at the same time. With access to the join, I shot some glue under the brace (after cleaning it) using a plastic pipette.
After gluing up the rest of that seam, clamping, and cleaning it, I also added this bigger clamp in the middle to press the back down with enough pressure to engage that loose back brace. At the same time, I drop-filled the related back crack with glue and wood dust so that after applying light finish to it, it'll be more or less invisible.
What a lot of clamps! See the ones in the soundholes? In each case, those are clamping "patches" under the top to reinforce weakened areas. I've installed a complete 2nd brace below the fretboard extension to make that area extra-stable and the other two just have cleats to reinforce hairline-crack areas.
Remember that section where the brace had broken part of the side? After gluing that seam up I started drop-filling the chipped-out section with glue and added mahogany wood dust to it. After this first layer dries I'll do the second layer drop-filled with super glue and more wood dust, then lightly sand it out and finish the area lightly. At that point it should blend in a little better than it does, currently, and look a heck of a lot better than it did before. While this isn't as ideal as cutting a new piece of mahogany and fitting it perfectly, it's less time-consuming and "good enough for government work," especially as I'm not working on a Gibson or a Martin, here.
I'll have more on this tomorrow and also a beautiful little flamed koa Kumalae uke that I thought I'd have done today (it needed a tiny bit more gluing as it turned out).


Comments
I definitely appreciate the 'in process' photos and explanation.
Thanks for taking the time to do that.
Ben