
Workshop: Making it Right

Sometimes things don't turn-out the way we expect. I originally did a neck reset on this D-40 back in June, but the fellow who had the guitar worked-on for his friend wasn't happy with the extra-tall saddle post-reset (I hadn't replaced the bridge) and was worried about the bridge and long-term structural stability.
After being strung-up for a bit, he told me the bridge was separating on the back edge and that something needed to be done. I'd told him that during the reset I thought that I probably should've installed a taller bridge as the original was a bit on the low side (shaved, possibly, in the past) for the new angle. I didn't, though, because many customers are on a budget and can be suspicious about extra work. He took it for a second opinion which turned out to be the first opinion and so it got shipped back for me to get a new bridge installed.
I tend to slightly-overshoot resets on old Guilds because I know the tops can deflect 1/16" or more after they've been strung-up for a month or two -- they tend to do that because the tops are a bit thin for the tension on their late-'60s and early-'70s dreadnoughts. On top of that, Guild dovetails are not the most accurate, and this guy went back just a hair more than I like -- hence the tall saddle post-reset.
Anyhow, this guitar came back and proceeded to sit for a long time. I had to fit it into my repair schedule again and to make the job even slower, I realized I needed to make a custom bridge for it as my source for oversize, vintage Guild bridges dried-up since the last time I bought them (several years ago). So -- step one was to find some thicker rosewood that was around the same color. Some eBay hunting landed me a block that was close to what I wanted and good-looking. Here's how the new bridge turned-out...

It's a bit taller, a bit longer front-to-back, and a lot sturdier than the original. I profiled it in the way some later-'70s Guilds are, with just an arc sanded into the top of the bridge instead of distinct "wings" with contrasting curves. When I make custom bridges I also move the pins slightly aft of where they were on an old bridge (this makes them more stable) and cut my saddle slots with a full 1/8" of compensation to the bass side.
During the removal and reglue process, I noted that the original Guild bridge had a 2-4mm gap around the foot of it that was unglued (as the finish was under it) in the first place -- much like this Martin OM-42's bridge. On top of that it had a pretty good normal-Guild-belly-hump behind the bridge. The fresh reglue with the more massive, stable bridge helped remove a lot of that belly and after settling-in for a while, this guitar seems quite content to remain with just a minor one behind the bridge.

I still have a taller saddle, but the slot holds this one a lot more securely, the break-angle is lower on the saddle, and the extra bulk of the bridge brings peace-of-mind.

In this light you can see how my profiling of the new bridge is different from the old.
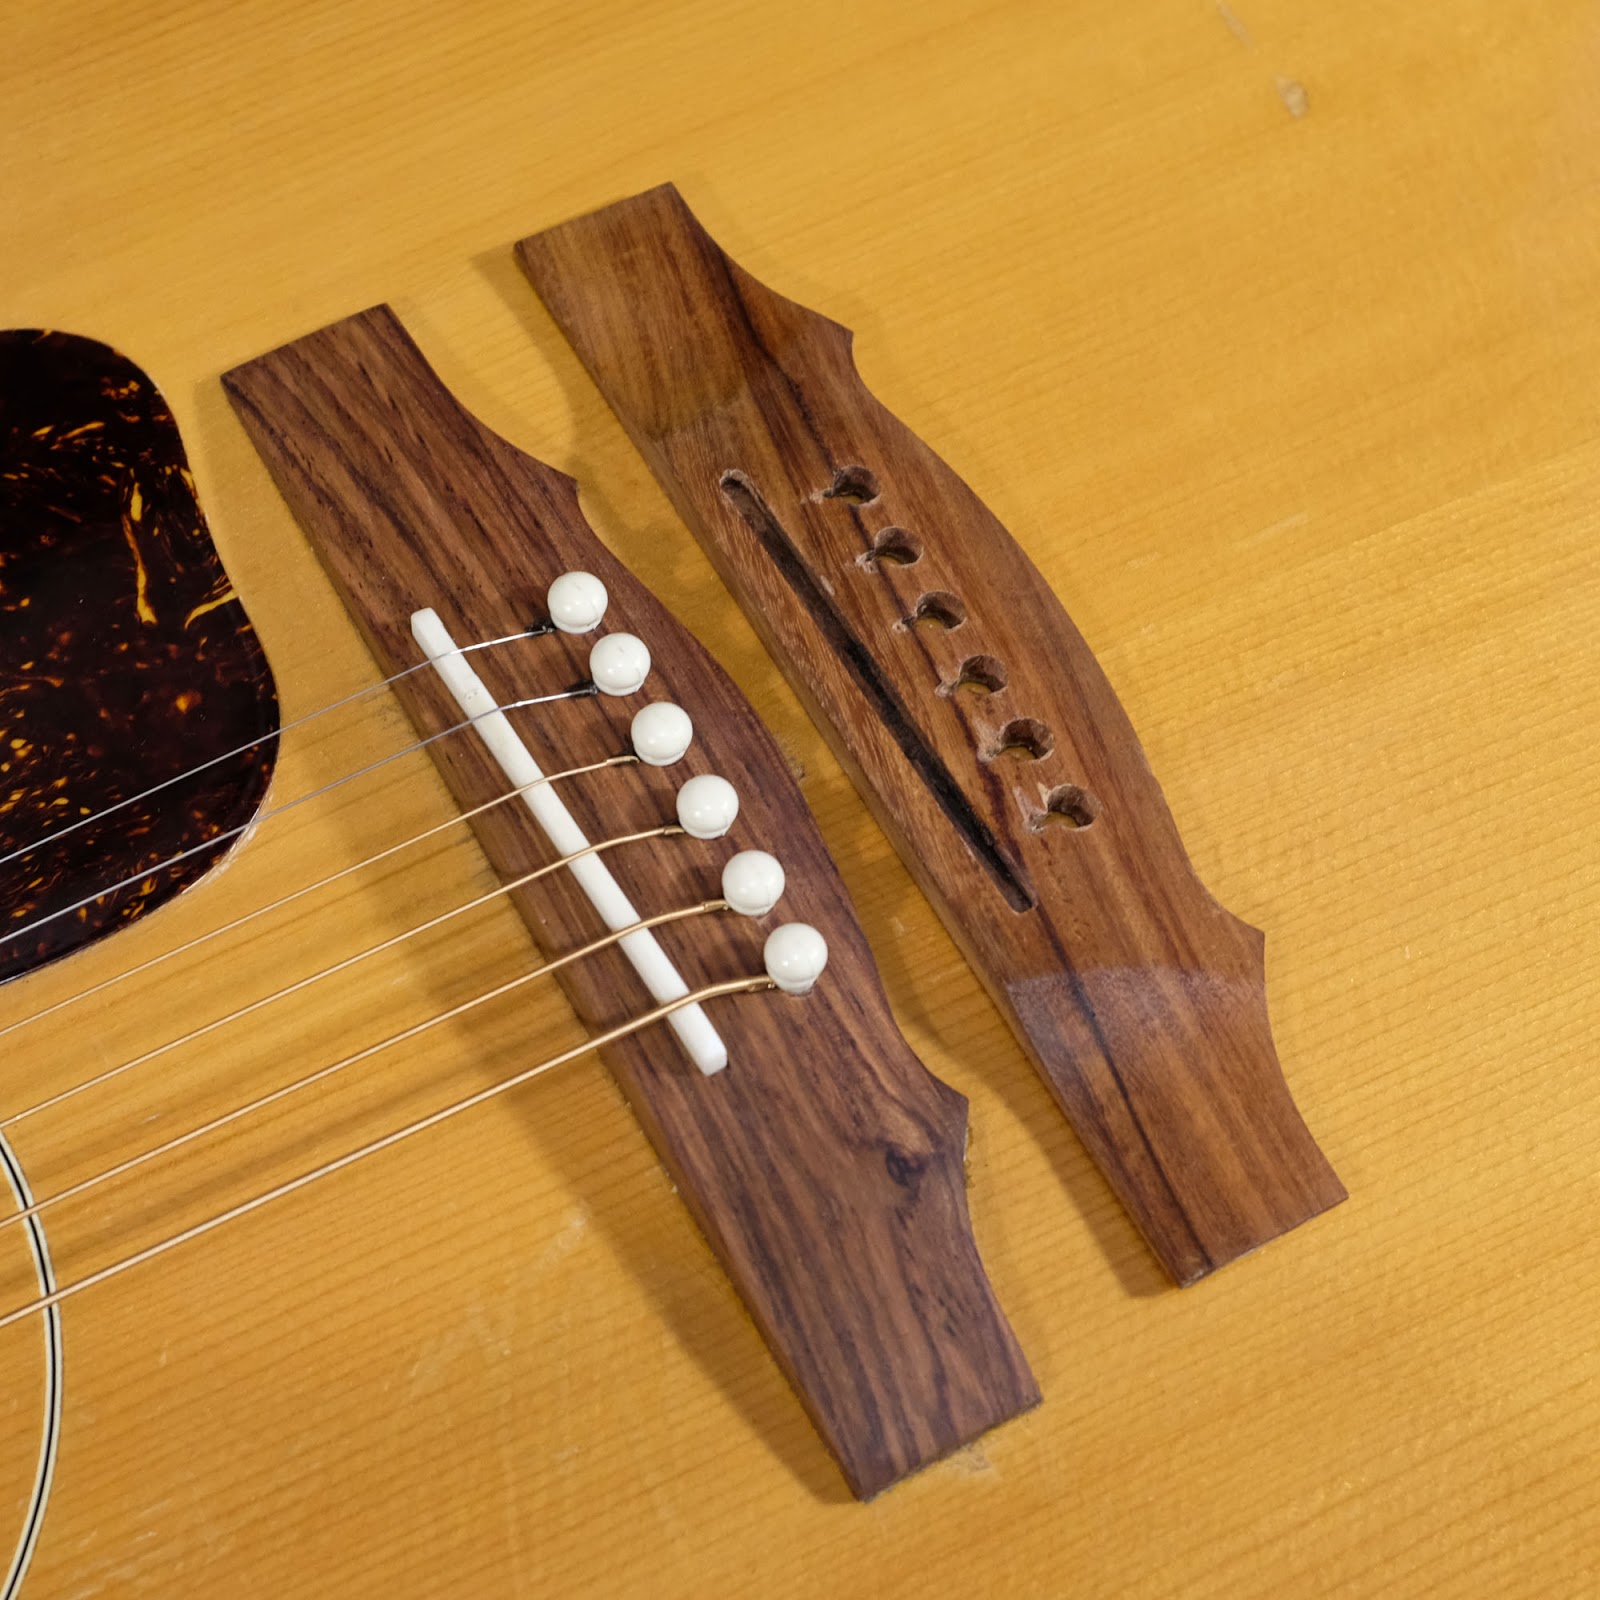
It's funny to note that the old bridge had the string-path not on-center with the bridge. It was off by about 1/8" or so. You can also see that in the above pic, the farther-aft pin holes have more wood between them and the saddle -- something that will help the bridge from splitting over time if it's neglected.

Comments
apart from all others,your simply the best
Robert