Workshop: Loose Japanese Hollowbody Electric Guitar Neckblock
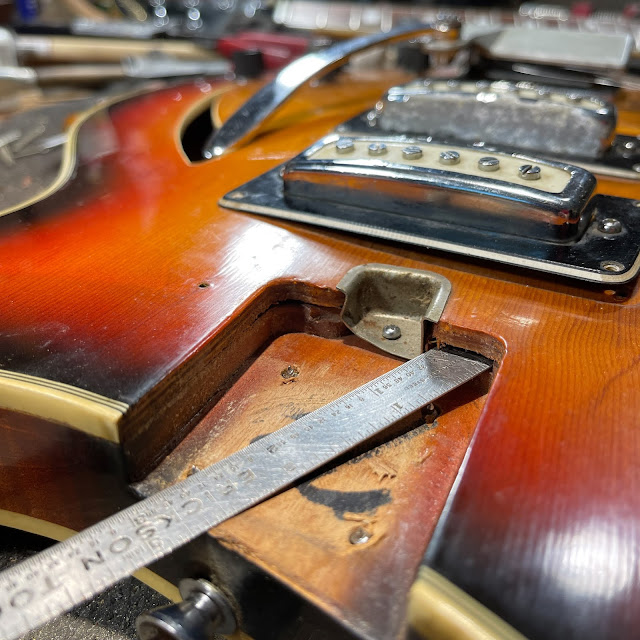
Here's a really common problem on old '60s Japanese hollowbody electric guitars. The top has deformed from its "arched" shape a bit as it ages and the neckblock has come unglued from the (now not form-fitting) top.
If you just leave it "as is" and try to use the guitar, the action will continue to climb as it continuously "settles." No amount of shimming the neck pocket will solve the problem and the whole thing will have a spongy, going-out-of-tune feel as well.
I've literally worked on dozens of this style and the most conclusive way to solve it is to attempt a reglue (using epoxy) of the neck pocket, but if you really want to make it stable, what I do is..,.
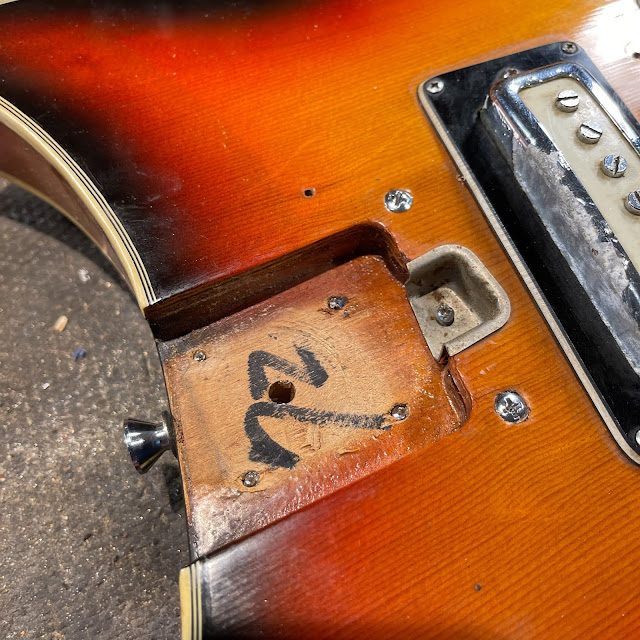
...I've drilled the 3/8" hole to receive the aluminum dowel -- that's how I got it in. Once I have it trimmed to fit flush and the "nose" is wet with epoxy while inside the body, I'll coat the very end of the dowel (on this side) with some epoxy as well. When I tap it in flush with the side (and, consequently, at the neckblock) it will suck that epoxy into the hole on this side and set-up overnight.
One could just leave it at that for support and I've done that on other guitars while using wood dowels, but here I've also secured this rod in place even better by predrilling three 1/16" holes from above the rod and through the top, endblock, and into the dowel itself. I've then "pinned" it in place with three finish nails which I've nipped-off to fit flush with the top. That thing tain't moving, now!
Fortunately, most tailpiece ends cover the additional pins. Many of the "butt plates" for trapeze-style tails will hide them, too... or you could undercut the pins and install using a slim tool to knock them into place -- then fill and color-match the 1/16" hole(s) left behind.
The final job is to secure the neck pocket as much as possible. It's almost always just the top that has come loose to it as tension over time distort the top's shape. I wick/shovel-in (with tools) epoxy into the gap left by the separation of the top to the neckblock and then clamp-up overnight.
That works only so-so on many of these Japanese hollowbodies because the top/neckblock plane of join is almost always a little wonky. You can see two screws I've countersunk into the top here to also reinforce the corners of the joint where it meets the top. I find that these are almost invisible to the wandering eye when the neck is reinstalled because there's so much chrome hardware all over and a truss-access "pool" right next to them.
Folks might say these are unnecessary but I've had to fix so many of these guitars over the years for local players wanting that "vintage vibe" of an old hollowbody that I simply know it makes sense to reinforce this area. It's a huge weak point and every little bit helps.


Comments